A lamp mounting problem

Joined
2 Jun 2024
Messages
8
Reaction score
1
Country
United Kingdom
Hi ,
So i have this annoying problem i have no idea how to deal with best. What i really want is to replace old hook type ceiling lamp to a new led type one .
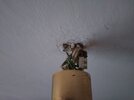
Problem is mounting , the old one is so old , so it has no electric box neither any mounting parts , just got to hang on wires . Added a picture below. All i want to is to replace this contraption to flat one mounted with screws . Any suggestions ? Thank you.
 

Attachments

  • 1000002629.jpg
    1000002629.jpg
    169.1 KB · Views: 66
Look through wire hole and see which way joist goes.
There should be one going across near hole.
Draw pencil line across on ceiling to mark so you know where to fix new light screws...
Is that what your asking?
 
Usually the new LED light will be screwed to the ceiling and the cables go straight into the light. Don’t cut the hook unless you absolutely have to, someone might want a pendant fixture again in the future. Make sure you don’t hit the cable drilling the holes for the new light.

The ceiling could well be concrete, in that case no joists to be found.
That's right , i forgot to mention it , but ceiling is a concrete and i was looking at drilling as a last resort . Thank you for your concern.
 
Look through wire hole and see which way joist goes.
There should be one going across near hole.
Draw pencil line across on ceiling to mark so you know where to fix new light screws...
Is that what your asking?
Thank you for quick response , i forgot to mention that ceiling is a pure concrete , so there is no joist , would be way easier to fix it without trouble.
 
i forgot to mention that ceiling is a pure concrete , so there is no joist , would be way easier to fix it without trouble.
It is possible to drill into concrete ceilings to mount light fittings.
However, one must be careful not to drill into cables/conduits lying just below (above !) the surface of the ceiling.

Usually (?) it is possible to determine the direction in which any conduit/cable is going
and
avoid this "zone", when drilling.

However, it would be possible to
use an "Epoxy Adhesive"
to affix a "substrate" (say, a "ply-wood donut like disk", at least 12 mm thick)
to the ceiling
and
to this "disk" screw the new light-fitting - using short screws..

(Of course, the major problem with this is to hold the "disk" in position - on the slightly textured ceiling - for the half-hour or so while the adhesive "sets".

Also, do not use MDF, nor any non-water resistant material.)
Interesting , this Epoxy Adhesive is suitable for drilling after it dries ?
 
What does your new fitting look like?No point us all guessing .Which room is this in?
 
Get an SDS drill, they‘re fairly cheap if you only want to use them for drilling holes. As the others said, make sure you don’t hit the cable or any other cables though.

I suppose you could somehow devise a way of fixing a piece of OSB or timber to the original hook but that doesn’t sound very sturdy.
 
Interesting , this Epoxy Adhesive is suitable for drilling after it dries ?
Epoxy Resin does not "dry".
It sets, after mixing the two parts together
and
bonds to anything which it has "wet".


The point of using an adhesive is to affix a piece of "timber", which easily can be drilled and screwed.

In fact, one
could attach the fitting to the timber "on the ground',
remove the fitting,
adhere the "timber" to the ceiling (which needs "holding in position" !)
and (after 20 minutes - using quick setting adhesive) then re-affix the fitting to the "timber"- using the previously drilled holes.
(See https://www.amazon.co.uk/ARALDITE®-EPOXY-TUBES-STRONG-ADHESIVE/dp/B072KS9M3T/ref=sr_1_7?crid=1OWY16RH9M0I7&dib=eyJ2IjoiMSJ9.mktIbGeaWMkhtanRs1-ylIfYPirF10SJsc50Xqp_dnTRtuc1d8Gegl067jLnp6V_5CLWKHn0bw8PRv0nVaIWeNOJNwEboTMjJJ8ey6HzpojlWfzoPWFK1CDhQvGPSh5tLl_B3uaGivr6rX_n6LNCrxvoA7yZhpTNBLaoHVK7al9f5Q1UnK6UzncSHKH35_5kgfnkLnu9hjY4sjz3yQHGSXecMUFTdp9C29d0KXIcxl0q_2VOKNKUuxeVfoXMxtqDkprh5TK5WU5FIMIjPC6etfoer2v0ymlN4badjRWXBOs.4e8AZlrV_T-4FNKnMZQfWsxbfFF-bi7A7mJrd6FR-_U&dib_tag=se&keywords=araldite+rapid+2+part+epoxy+glue&qid=1717460964&sprefix=araldite,aps,379&sr=8-7 )

Epoxy Resin sets "as hard as a rock" - but that is not the point.

For something which can be "drilled",
see https://www.amazon.co.uk/Weld-8267-SteelStik-Reinforced-Stick-2/dp/B00RN7CT2U/ref=sr_1_6?crid=1KMNNQIYSVSXF&dib=eyJ2IjoiMSJ9.SDa7GXFkfcebjz1Ep62iZS6hf4ijQyJPO4IKv8GqIougdKmJZEpasMiBv3kdDDhnDaMv-ddPS8zSeWWXeehZpQnzTio1rq9uPm-Cp8tKSQu9PgbdbBgHXaeNLWf0PkVLuao02VeFvcJd3CXAjqc8uWnszxftsTQBqYehehdtE-hTbElkF5zJlJAe7TUPgFjS8lKRhOklS5P2ja7yl0wuM1RMUuvZVxKQ_MPUHN7I9y9BaLM5h-wxJpcw6B837DujyVbxEN28cP3UlLcUY28Us7M3q3qjtmgrDawg9GR_EiA.6sEOTSHoqN0ZPRAexMvKZa0uQcmqgO8BQL0_KB7teXg&dib_tag=se&keywords=epoxy+putty&qid=1717461130&sprefix=epoxy+putty,aps,382&sr=8-6&th=1

This "mixes" like "modeling clay",
sets within 20 minutes
and
can then be drilled.
 
We have these all over our house and it is very difficult to put a fitting that has to go flush with the ceiling because:

a) 99.99% of the time the wires are stiff and you can't manipulate them to fit in the fitting and get it flush and
b) the hook is in the way of any modern fitting

We gave up and just used a suspension kit that has an integrated piece of plastic that hangs on the hook and allows you to choose any bulb/lampshade combination that you like. It is still a massive pain to fit, but once it is on you can at least change the bulb/lampshade when you want.


Attachments

  • 20240604_214302.jpg
    20240604_214302.jpg
    190.9 KB · Views: 26
So I decided to go with drilling. And boy it was a nightmare. I have no idea what those old buildings were made of, but every time I tried to fit plastic fixing parts, lamp comes with, those just pop out . Three sizes of drills and effect is the same, concrete, if this even can be described as such, crumbles and becomes unfit. Now I don't have a modern lighting, don't have a old lamp hanging over and don't have any clue how to better fix this. It's a nightmare.
 

Attachments

  • 20240606_182600.JPG
    20240606_182600.JPG
    107.2 KB · Views: 34
Once again, Epoxy Resin can be your friend.

You have drilled the holes.
The "material" into which you have drilled is "crumbling"
and
"Plastic Anchors" will not stay in.

Place a disposable cover (e.g. Newspaper) over the floor underneath - to catch any "drips".
Internally, cote the "crumbling holes" liberally with fresh correctly mixed epoxy resin,
cote the (just long enough) "Plastic Anchors" with the Resin
and
insert them into the coated holes.
Apply "Sellotape" (or the equivalent) to hold the anchors and epoxy resin in place, while the resin sets.

If you have mixed the Resin correctly,
after the "setting time" (which may be 24 hours) you will have very solidly set anchors - which certainly will hold up a "Light Fitting".
 
Last edited:
Once again, Epoxy Resin can be your friend.

You have drilled the holes.
The "material" into which you have drilled is "crumbling"
and
"Plastic Anchors" will not stay in.

Place a disposable cover (e.g. Newspaper) over the floor underneath.
Internally, cote the "crumbling holes" liberally with fresh correctly mixed epoxy resin,
cote the (just long enough) "Plastic Anchors" with the Resin and insert them into the coated holes.
Apply "Sellotape" (or the equivalent) to hold the anchors and epoxy resin in place, while the resin sets.

After the "setting time" (which may be 24 hours) you will have very solidly set anchors - which certainly will hold up a "Light Fitting".
My next attempt! Time to step forward!!
 
An old trick is a tube of plaster repair filler, e.g. Moltofill. Squeeze in as much as you can and push a regular plastic plug into the goo. Wait for a few hours and fix whatever you want to fix. Works 90% of the time unless you‘ve got extremely crumbly bricks or soft mortar.
 
Back
Top