Fitted wardrobes plan, suggestions appreciated

Joined
2 Dec 2004
Messages
504
Reaction score
4
Country
United Kingdom
Hi all,

I really want to make my own fitted wardrobes for my bedroom.

I have looked closely at the Ikea Pax system. Its good, very modular, very flexible. But its white melamine chipboard and I really did want something more premium.

I am looking closely at 18mm veneered mdf board for the carcasses. I would need to make the cuts using a tracksaw as demonstrated in Peter Millard's youtube videos. I am thinking of using a simple dowel jig to construct the cabinets with dowels and supplemented by glue and pocket screws angled in from the underside and topside which won't be seen. Shelves would be sitting on those small shelf support pins. I am keen on having a solid backpanel too so would be thinking of making that from 6mm mdf rebated into the rear of the carcasses. I think I could route a rebate like that with a small router although have never used one before.

Plan is for all the carcasses to sit on a plinth.

Famous last words - but I think that making carcasses out of sheet material would be within my capability if I get myself a tracksaw, small router, and the right dowel and pocket screw jigs?

My main problem I think will be doors.

Firstly, if Im making the carcasses out of a veneered mdf lets say walnut or sapele, should i make the doors out of the same? It will be dark inside and out. Or should I go for a painted finish on the doors out of standard mdf? I have seen Peter Millard's door making videos and I don't have a router table so I would need to make them using the glue on backpanel method.

Or should I buy the doors in, i.e from Ikea, and fit them to my own carcasses? This might be easier.

I can't afford to get custom made mdf doors.

Does anyone have any suggestions to help me finalise my plans please?


Oh also to add - the tracksaw I was intending to buy is the one reviewed by Peter Millard just last year - the screwfix MacAlister model. However its no longer available. Peter Millard also says the Aldi model or Lidl model are ok but neither of those are available either.
 
Last edited:
I have looked closely at the Ikea Pax system. Its good, very modular, very flexible. But its white melamine chipboard and I really did want something more premium

I am looking closely at 18mm veneered mdf board for the carcasses.
OK, but how do you want to edge the cut MDF? Iron on veneer is good (needs an old dry iron, a presser aka a piece of MDF with some felt glued on and a laminate trimmer or router and trim bit), but solid hardwood lippings look better and they allow a more professional radiused profile, however they really do need a router or laminate trimmer and trim/round-over bit and benefit from having a power sander

I would need to make the cuts using a tracksaw as demonstrated in Peter Millard's youtube videos. I am thinking of using a simple dowel jig to construct the cabinets with dowels and supplemented by glue and pocket screws angled in from the underside and topside which won't be seen.
Avoid pocket screws in MDF - they are often very weak and can break out if subjected to any undue stresses when manhandling units into position (that comes from having dealt with carcasses made from them - never seen
a shopfitter or barfitter use them or used them myself because of their fragility. TBH 8 x 40mm glued dowels on 64mm or 96mm centres are far stronger, but will require some cramps (which can be home made from 2 x 1 PAR softwood). Biscuit joints are also pretty good, but again require clamps. Firms such as Knapp Verbinder make specialised KD (knock down, flat pack) fittings for use in biscuit slots

Make your carcasses as single units no wider than about 1 metre to avoid sagging and joint failure when positioning.

Note that a reliable timber yard should be able to cut to size accurately for you

Shelves would be sitting on those small shelf support pins.
You can get relatively inexpensive drilling jigs for those and for the handles

I am keen on having a solid backpanel too so would be thinking of making that from 6mm mdf rebated into the rear of the carcasses. I think I could route a rebate like that with a small router although have never used one before.
Go for 8mm or 12mm for your back panels. They are heavier but more rigid

Plan is for all the carcasses to sit on a plinth.
Good idea. A separate plinth is easier to level and fix to the floor

Famous last words - but I think that making carcasses out of sheet material would be within my capability if I get myself a tracksaw, small router, and the right dowel and pocket screw jigs?
As I said, about pocket hole screws...

My main problem I think will be doors.

Firstly, if Im making the carcasses out of a veneered mdf lets say walnut or sapele, should i make the doors out of the same?

It will be dark inside and out. Or should I go for a painted finish on the doors out of standard mdf?
Your shout. A basic door is just a piece of cut and lipped material when all said and done. You don't need a router table for that, but as a basic router table is just a router mounted beneath a piece of sheet material with a hole cut in it, and a simple fence is just a piece of planed 2 x 2in softwood, creating a basic router table is not rocket science, either. I've built my own out on site (shop and bar fit) quite a few times over the years.

I have seen Peter Millard's door making videos and I don't have a router table so I would need to make them using the glue on backpanel method.
5-piece frame and panel is better if you can manage it

Or should I buy the doors in, i.e from Ikea, and fit them to my own carcasses? This might be easier.
Yes. There are firms who make bedroom doors to order, e.g.in Manchester or Sheffield I'd suggest looking at HPP (Hills Panel Products). Elsewhere in the UK there are other firms

I can't afford to get custom made mdf doors.
OK, so it's make your own. Bear in mind you will need some form of accurate drilling jigs for the hinge cruciform plates and the hinge cups (or possibly a cheap drill press/portable drill and press either with a home made fence - homge cup holes are too risky to freehand IMHO)

Does anyone have any suggestions to help me finalise my plans please?
Learn the basics of Sketchup, a free to download piece of 3D design software. It will help you visualise what you are attempting. No need to put in all the joint or hinge details, though, just stick to the basics

Oh also to add - the tracksaw I was intending to buy is the one reviewed by Peter Millard just last year - the screwfix MacAlister model. However its no longer available. Peter Millard also says the Aldi model or Lidl model are ok but neither of those are available either.
Maybe have a look for Einhell or Scheppach? If finances are tight it may be possible to build your own guide rail for a conventional saw (that has been discussed on this site as well) - whatever else you will need some form of breaking down table and a pair of trestles and somewhere to lay down an 8 x 4ft sheet flat and work on it (a 10 x 6ft minimum clear space) (again discussed elsewhere)

Do a search of this site for cabinets, wardrobes, cupboards, etc. This question of how to build these has come up from time to time (I remember replying to several such threads over the last 2 or 3 years), so there is a lot of stuff out there, on here. I'm pretty sure I still have the Sketchup drawings I did to illustrate previous threads if needed
 
Last edited by a moderator:
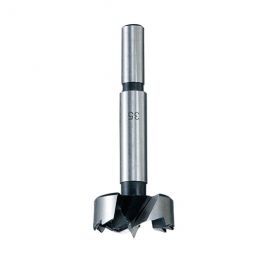
I did buy a small Axminster bench drill when I built my kitchen from sheet materials years ago. It was fine for the smaller doors but a PITA for the long doors, I couldn't be bothered to make a platform to support the doors whilst it was on the drill bed. I often now just drill a 1.5m hole as a guide for the 35mm cutter and use a cordless drill. Of all of the cutters I have used, the Makita one has been the most impressive.

 
@JobAndKnock thanks for your reply.

I am looking at walnut or sapele veneered MDF sheets, and I was planning to put iron on edging onto the exposed edges facing forwards to the room. I was hoping to make my cuts so that all the cut edges will be at the back of the carcasses, so I can utilise the factory cut edges for the front more visible areas. Maybe I can get factory edged pieces also, not sure. I wouldn't be applying the iron on edging to the back, top or bottoms as they won't be visible Im hoping. I could consider lipping the cut edges but Im not sure I have the skill for that.

So regarding construction - I was planning to have the horizontal top and bottom parts sandwiched between the two sides and was going to use dowels and screws straight in through the sides to hold it together, then also screw together the carcasses hiding the screws where the hinges are. So Im hoping that none of this would be visible. The only place I didn't want to do this was on the leftmost side of the whole setup as this large end panel will be visible as you walk in the door to the room (its on a plain flat wall not in an alcove). By using screws with the glued dowels I was thinking I could avoid having really long clamps.

I will take a look at how to make a basic router table then - if its a simple enough option I could have a go.

Do you have any concerns about the materials Im proposing and the expected finish? Is veneered MDF a good upgrade or should I just be looking at a simpler, cheaper MDF that I can paint?
 
Brilliant summery jxk (y)

just to add iff your 100% set on doing it i would practice making bed side cabinets/ vanity unit /blaket box or what ever you fancy and hone your skills where small mistakes and getting panels too small or too big are far easier to rectify and small deviations in measurements dont matter as the gap to be filled is not an exact size
 
Brilliant summery jxk (y)
Can you tell I've done this before? :cool:

I'm fully with you on the idea of the OP cutting their teeth by building a smaller unit before tackling something bigger
 
Last edited by a moderator:
Can you tell I've done this before?
more times than i have had hot dinners ;)

learning the intricacies off routeing 'conti board' track saw' adding material thicknesses and clearances are all lessons that should be fully learnt individually because they all need equal attention and iff you are concentrating too hard on one point you WILL overlook something else just how many times 'extra wasted time and materials is the question time will answer :confused:
 
I am looking at walnut or sapele veneered MDF sheets, and I was planning to put iron on edging onto the exposed edges facing forwards to the room. I was hoping to make my cuts so that all the cut edges will be at the back of the carcasses, so I can utilise the factory cut edges for the front more visible areas. Maybe I can get factory edged pieces also, not sure. I wouldn't be applying the iron on edging to the back, top or bottoms as they won't be visible Im hoping. I could consider lipping the cut edges but Im not sure I have the skill for that.
OK, not a problem. I admit that lipped is more complex, and takes more equipment.

So regarding construction - I was planning to have the horizontal top and bottom parts sandwiched between the two sides and was going to use dowels and screws straight in through the sides to hold it together, then also screw together the carcasses hiding the screws where the hinges are.
Yep, that will work and is easier than using dowels, biscuits or pocket hole screws. I've always hidden my joining screws beneath hinge cruciform plates, in back corners, in top corners and behind shelves, etc. Bear in mind you will ideally need an absolutely flat surface to assemble your carcasses (something like an 18mm sheet of chipboard or plywood)

So Im hoping that none of this would be visible. The only place I didn't want to do this was on the leftmost side of the whole setup as this large end panel will be visible as you walk in the door to the room (its on a plain flat wall not in an alcove). By using screws with the glued dowels I was thinking I could avoid having really long clamps.
Build your end unit as a separate unit and your carcase clamps can be made from a few lengths of 2 x 1 PAR softwood. It is always possible to hide such details with a planted-on skirting and a cornice moulding detail

I will take a look at how to make a basic router table then - if its a simple enough option I could have a go
When I get home later I'll look out those sketches and post them. But do you actually need one? If you aren't making 5-piece framed doors, probably not

Do you have any concerns about the materials Im proposing and the expected finish? Is veneered MDF a good upgrade or should I just be looking at a simpler, cheaper MDF that I can paint?
I have no concerns. Have you thought about how you intend to finish the material? (e.g. oil, lacquer, etc)

Only thing I'd say is that B-As advice about cutting your teeth on a smaller, cheaper project using the same principles is very sound indeed and could save you a lot of unnecessary angst when you do the bigger job
 
A friend of mine has the MacAlister saw. When ever he wants accuracy, he borrows my Festool plunge saw...
 
OK, not a problem. I admit that lipped is more complex, and takes more equipment.

A carpenter friend of mine used to get his veneered MDF cut to size and lipped by his timber yard. He used to use NuLine in London W11 but it looks like they are now part of Lords.
 
There are a number of yards who do this. I know a few reliable places in Lancs/Yorks. It depends where the OP is though
 
Last edited by a moderator:
Im in Birmingham.

I get what you're saying about making a smaller project first - the problem is that we're moving into a new place and don't have any wardrobes so these will be quite a priority for us.

The kitchen units will need replacing within a year too so I'd be hoping to make my own carcasses and doors there, and also I want to open up the small space under the stairs and make some cabinets to go inside there.

I'd like to make more stuff, we need a tv unit for example, but I don't have one at all so I may have to buy that straight away rather than waiting. Same for bathroom cabinet for towels. Thing is, bathroom cabinets, tv units etc, those are cheap so I don't mind so much. But wardrobes being so expensive to buy, that's why Im focussed on making some.

And I still want to make a decent size insulated garden outbuilding as well but that would be next summer.
 
We bought some cheap hanging rails from argos whilst we were renovating our new to us bungalow and until we got the built in wardrobes.
 
the problem is that we're moving into a new place and don't have any wardrobes so these will be quite a priority for us.
When we moved into our last house I had to start from scratch. For 2 years our "wardrobes" were black steel conduit onto timber battens inm alcoves and the "chests of drawers" were stacked Euro crates. And I'm a carpenter and joiner (although in my defence I did have a Yorkshire greys roof to strip and rebuild - grade II listed, too - plus a new roof to go onto the lean-to kitchen).

The kitchen units will need replacing within a year too so I'd be hoping to make my own carcasses and doors there, and also I want to open up the small space under the stairs and make some cabinets to go inside there.
Relatively straightforward if you can source pre-banded MFC (melamine-faced chipboard). Pre-made kitchen doors are easy to find

I'd like to make more stuff, we need a tv unit for example, but I don't have one at all so I may have to buy that straight away rather than waiting.
Good. All I'll say is it's amazing what you can produce with softwood planking and concrete blocks...

The difficulty is that veneered MDF isn't particularly cheap, and walnut in particular is one of the more expensive veneered boards to choose. You haven't got a lot of experience, and I'm wary of encouraging you to spend a lot of money then fail as that will leave you set against DIY possibly forever.

The first task is to find yourself a workspace where you can set-up a cutting table to break down your sheet stock. Homemade "quick and dirty" trestles can be made from 3 x 2in (70 x 44mm) or 2 x 2in (44 x 44mm) CLS or scants (providing they are straight) with maybe some plywood or chipboard offcuts, and look like this:

Quick and Dirty Trestle - Demountable Type.jpg


By using sheet material for the leg braces (the light coloured pieces) it is possible to make this sort of trestle so that it can be knocked down into 3 pieces for storage (flat) and transport. Or you could just buy a couple of folding trestles at £40 to £50/pair, or more. I tend to make mine about 900mm high x 900mm wide from materials I have available (often 2 x 2in or 3 x 2in CLS), but I'm not overly 'precious' about how they look, so long as they are sturdy. To sit on top of those I make-up an approximately 7 x 3ft (2100 x 900mm) cutting table out of 2 x 2in or better still 3 x 2in softwood:

Quick and Dirty Breaking Down Table.jpg


which is screwed to the tops of the trestles. Again appearance isn't critical, but that 7 x 3ft (2100 x 900mm size IS - it is the smallest size I've found capable of adequately supporting an 8 x 4ft (2440 x 1220mm) sheet of material, whilst also being small enough and light enough to be moved around fairly easily. You absolutely need a flat work table at about waist height to use a rail and saw and cut both accurately and safely. You also need a large square, which can be home made from rips of ply or MDF:

Square Guide for Saw.jpg


Oh, and if you need a router table (probably doubtful), that, too can be home-made using bits of MDF, 2 x 2in softwood and 2 x 1in (44 x 22mm) softwood lath:

Router Table 101.jpg


It all starts from a simple base:

Router Table 003.jpg


You were also concerned about sash or carcase cramps. Basic wedge-type cramps can be made from 2 x 1in softwood lath, like these:

Home-Made Cramp 002.jpg
Home-Made Cramp 001.jpg


although there are other designs as well, including the Spanish windlass (fundamentally a long string and a piece of wood - very us3ful for box shapes). It isn't always necessary to buy stuff - in fact one thing I learned long ago on-site installs was that you need to find ways to do things without a full workshop - so no racks full of sash cramps, no workbench, no aircraft-carrier-sized panel saw, no edge bander. Just you and a pile of timber, some basic tools, and a bit of ingenuity.
 
Last edited by a moderator:
The difficulty is that veneered MDF isn't particularly cheap, and walnut in particular is one of the more expensive veneered boards to choose. You haven't got a lot of experience, and I'm wary of encouraging you to spend a lot of money then fail as that will leave you set against DIY possibly forever.

Yeah I get you. The you tube videos make it look so easy and are lulling me into a false sense of security I imagine.

In the past when I DIY'd, I never had the cash to buy decent tools, and youtube didn't really exist in the same way as it does now in 2006. Things are different now, I don't mind investing in some reasonably priced tools and accessories and the learning resources available are great.

Just going to have to bite the bullet.

The Ikea doors weren't too bad, i just didn't want white chipboard carcasses really with a million holes all over the place for all their add-ons.
 
Back
Top