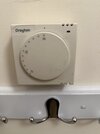
So I’m trying to replace my old Drayton LP111si timer and manual Drayton thermostat with Google Nest connected to my Ideal Logic Combi C30…
I’ve followed @stem ‘s brilliant instructions so far to get the Heat Link installed, the Google Nest is working powered by a USB cable, and my original thermostat is set to 30 degrees, which is working fine as a make shift solution.
I was trying to follow the instructions to decommission the old thermostat but that’s where I got stuck.
So I’ve attached some pictures which I hope are clear enough to see,
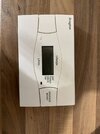
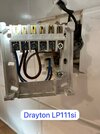
Pictures 1 & 2 show the wiring of the Drayton LP111si
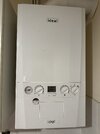
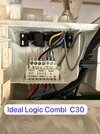
Picture 3 & 4 Show the wiring of the Idea Logic Combi C30 boiler
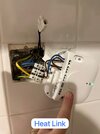
Picture 5 shows the wiring I’ve done in the Google Nest Heat Link
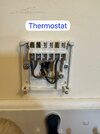
Picture 6 & 7 show the wiring in the Drayton thermostat.
Initially I thought it would be great if I could just use the same wires from the old thermostat to power the Google nest, however it’s a good job I double checked because these were 230V wires.
So I decided to try and decommission the old thermostat, my original thought process was to just wire these into a junction box and put a blank plate over it, I removed the black cable with the brown sheath, which then caused the Google nest to show an error saying something like heat link not connecting to boiler.
Which makes sense now that I’ve thought about it. My next thought is still to use a junction box, and a blank plate to decommission the old thermostat, but this time I was wondering if I could remove the brown wire with the white tag from the heat link from port 3 (see heat link picture) and use the black cable with the split junction seen at the top of the same picture.
My thinking is, as this black cable is connected to the Room Stat/Timer port on the boiler, this would enable the Heat Link to control the temperature of the boiler? As I think this is the same black wire with brown sheath that is connected to port 3 on the old thermostat.
need to know if what I’m planning is safe or if I should just give up and keep the old ugly thermostat set to 30 degrees?
Attachments
-
 IMG_3927.jpeg267.6 KB · Views: 105
 -
 14029a04-62a2-4b8d-b0a6-fd70c1f30a0d.jpeg230.3 KB · Views: 101
 -
 IMG_3931.jpeg158.9 KB · Views: 92
 -
 6ccd656d-0770-4548-ae06-be467225beb7.jpeg291.8 KB · Views: 91
 -
 c964deb0-3117-4412-b89a-8b7832813081.jpeg190.1 KB · Views: 93
 -
 IMG_3926.jpeg179.4 KB · Views: 88
 -
 d9b212d2-c532-4640-aa69-561adc0062a2.jpeg219.4 KB · Views: 90
Last edited:

